Xiaomi HyperOS is known for its strict background memory management and multi-tiered permission system. To ensure that Hyper Bridge can reliably intercept incoming notifications, render islands seamlessly, and stay alive in the background, the app includes a central System Health Dashboard (SetupHealthScreen) and a dedicated Floating Notification Setup manager.
This guide walks you through every step required to achieve a 100% Healthy setup.
1. The System Health Dashboard#
In Hyper Bridge, open Settings → System Health (or tap the Health card in Diagnostics):
flowchart TD
    H["System Health Dashboard"] --> P1["1. Notification Listener Access"]
    H --> P2["2. Android 13+ Restricted Settings"]
    H --> P3["3. HyperOS Focus Notifications"]
    H --> P4["4. Battery Saver: No Restrictions"]
    H --> P5["5. Autostart Whitelist"]
    H --> P6["6. Floating Notification Setup"]
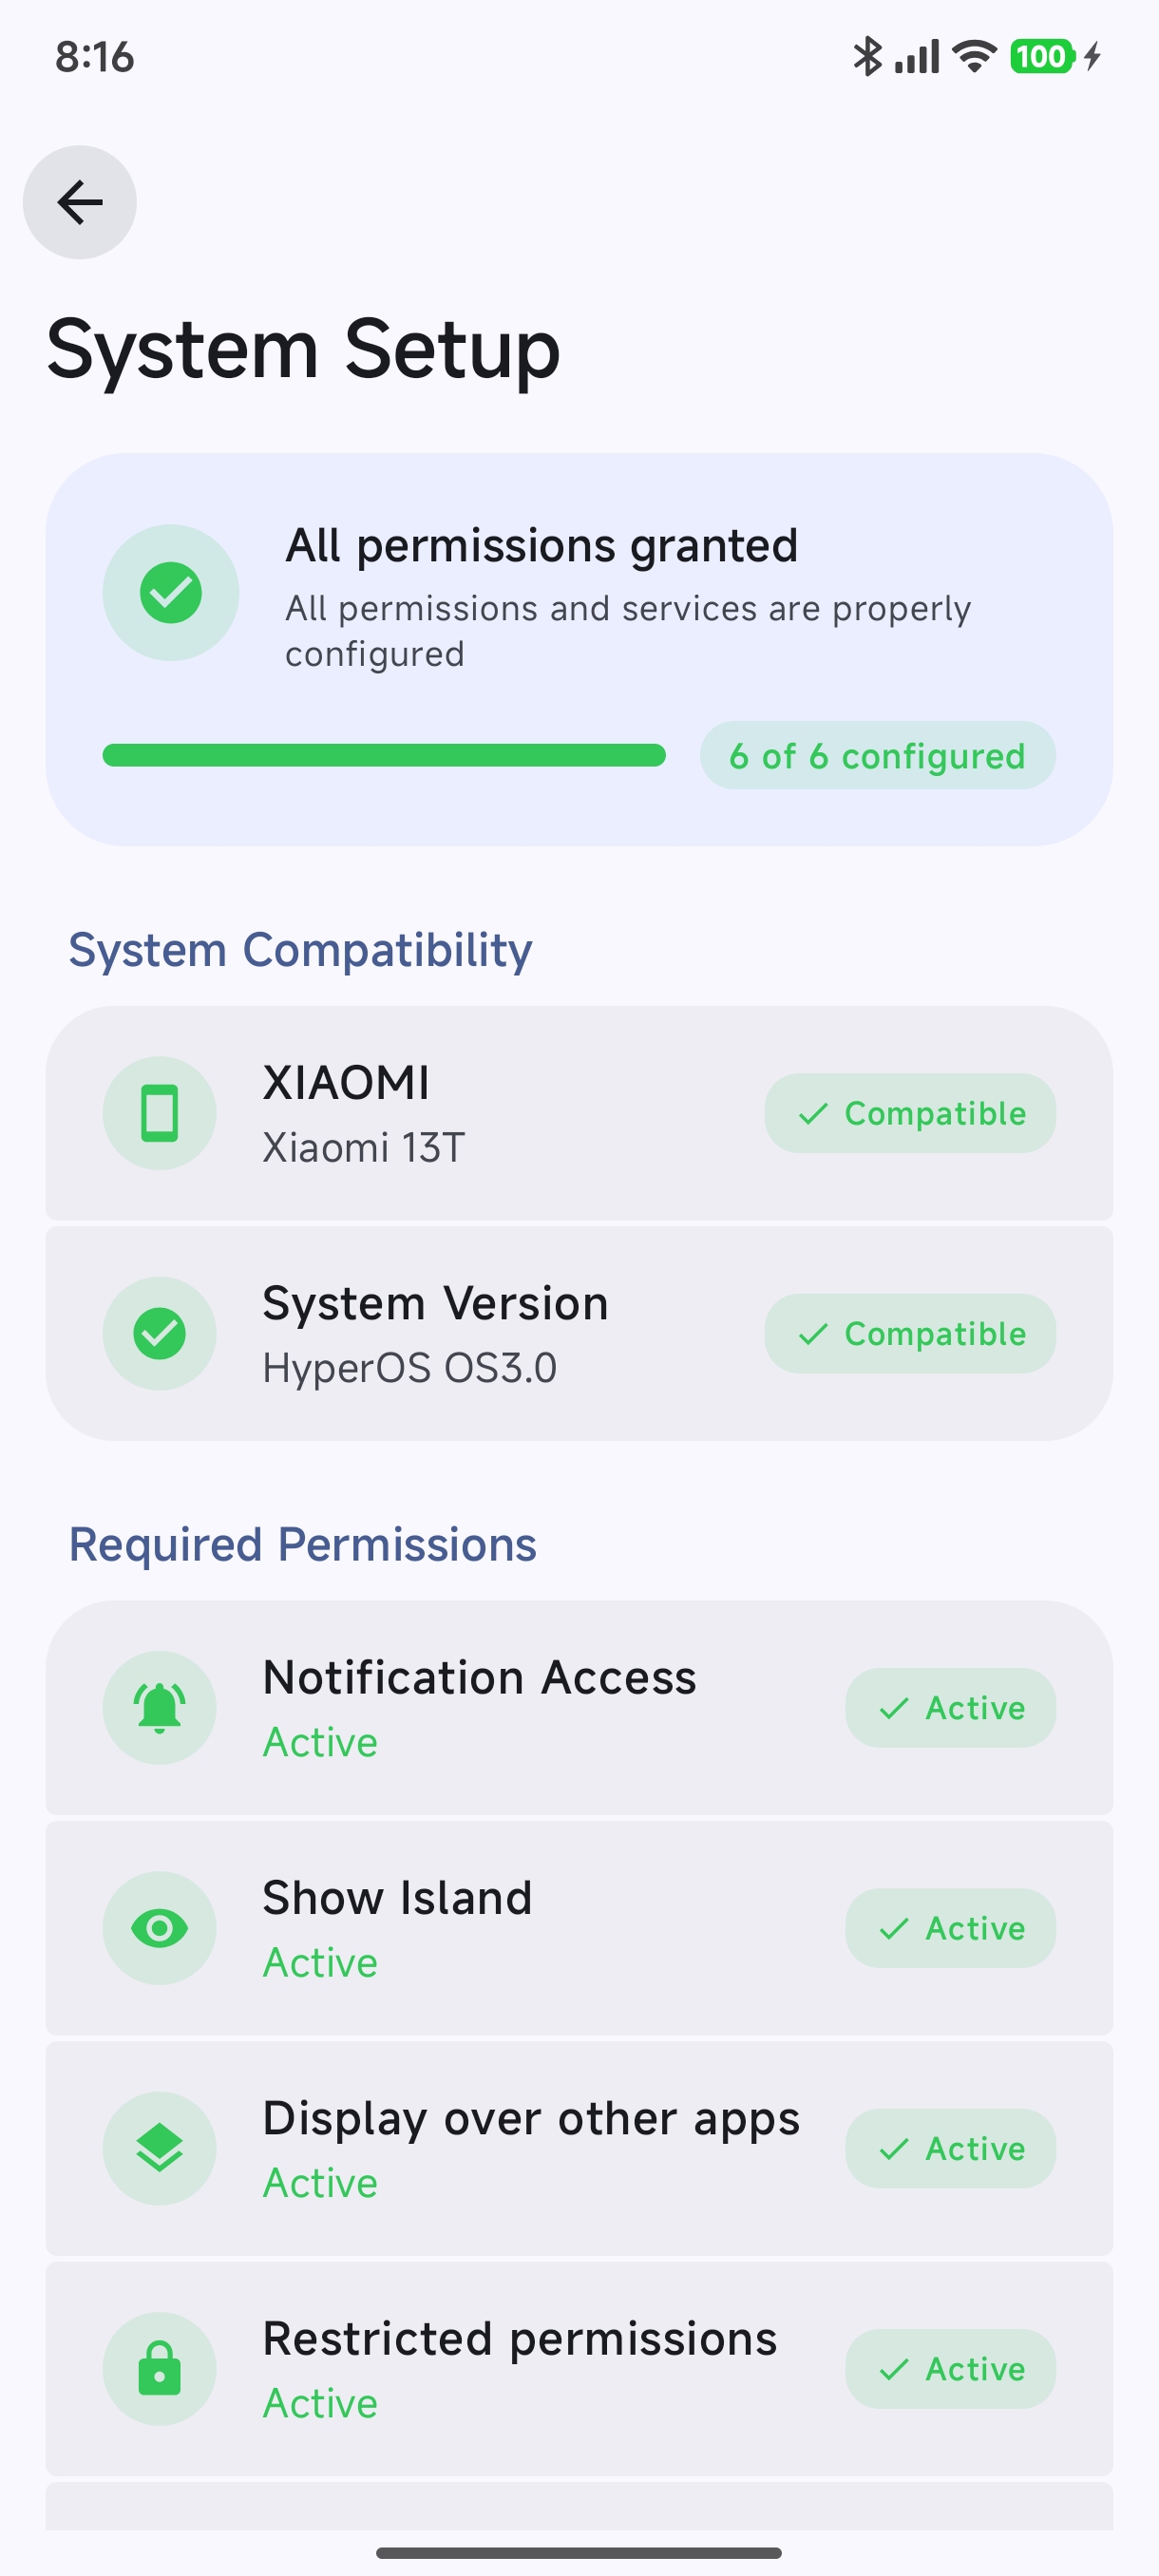
At the top of the screen, an expressive Hero Banner tracks your setup progress:
- Green (“System Health: Good”): All essential permissions are granted and the listener watchdog is active.
- Amber / Orange (“Needs Attention”): One or more required permissions are missing or restricted, preventing islands from displaying properly.
2. Essential Permissions Checklist#
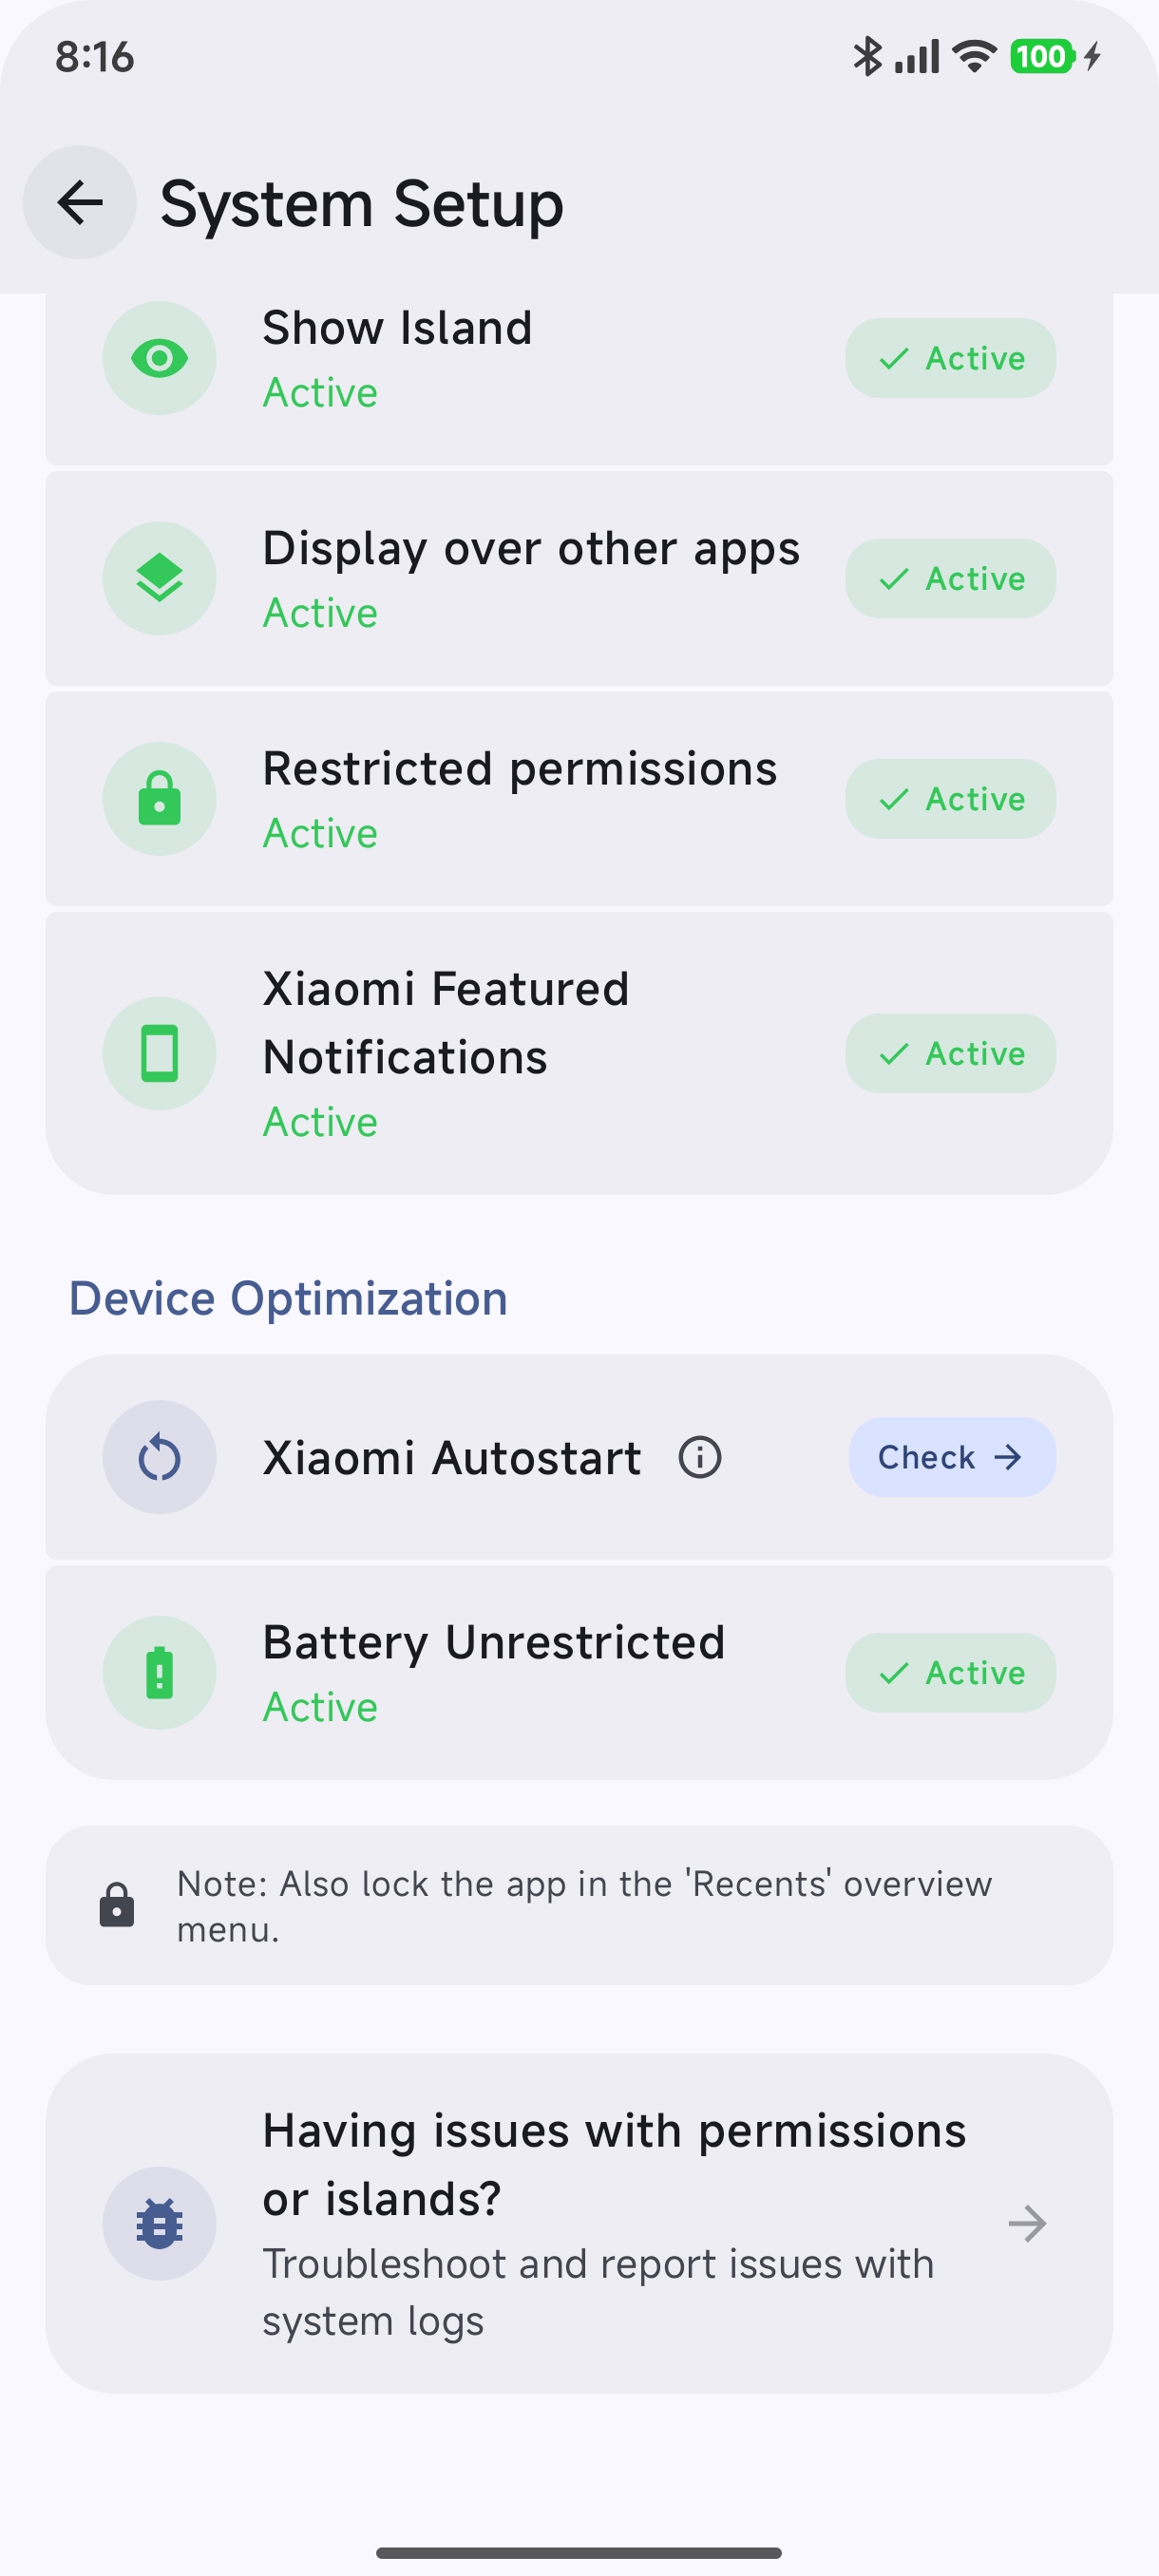
Each card on the System Health screen provides a 1-tap shortcut directly to the corresponding Xiaomi system settings page:
Step 1: Notification Listener Access#
- Why it is required: Android prohibits regular apps from reading alerts from other apps. Notification Listener access allows Hyper Bridge to observe incoming notifications and forward them to the island engine.
- How to grant: Tap Grant Permission → Locate Hyper Bridge in the device list → Toggle the switch ON → Accept Xiaomi’s standard 10-second security confirmation.
- Detailed guide: Notification Listener Access Guide.
Step 2: Android 13+ Restricted Settings#
- The Issue: On Android 13, 14, and 15, Google introduced a security measure that automatically greys out Notification Listener and Accessibility permissions for apps installed from outside the Google Play Store (e.g., APK downloads from GitHub).
- How to resolve:
- Open your phone’s Settings → Apps → Manage apps.
- Search for and select Hyper Bridge.
- Tap the three dots (⋮) in the top-right corner of the App Info screen.
- Tap Allow restricted settings.
- Verify your device PIN or fingerprint when prompted.
- Return to Hyper Bridge; the Notification Listener toggle will now be interactive.
Step 3: HyperOS Focus Notifications#
- Why it is required: Xiaomi HyperOS manages dynamic island elements through the native Focus Notifications channel. Without this permission, Hyper Bridge cannot render floating cards over other applications.
- How to grant: Tap Configure Focus Notifications on the health card → Ensure that Allow floating notifications and Focus notifications are enabled for Hyper Bridge.
- Detailed guide: HyperOS Focus Notifications Guide.
Step 4: Battery Saver: “No Restrictions”#
- The Issue: Xiaomi’s MIUI/HyperOS power manager automatically kills background services after 10–15 minutes of screen-off time if left on the default “Smart” battery profile.
- How to configure:
- Tap Configure Battery Saver on the health card.
- Select No restrictions.
- Hyper Bridge can now maintain its event-driven listener indefinitely without being terminated.
- Detailed guide: Battery Saver & Autostart Guide.
Step 5: Autostart Whitelist#
- Why it is required: Allows the Hyper Bridge background service to automatically initialize whenever you reboot your phone.
- How to grant: Tap Enable Autostart → Toggle the switch next to Hyper Bridge to ON.
3. Floating Notification Setup (Optional: Avoid Duplicate Popups)#
Why Does This Exist?#
When an app (such as WhatsApp, Telegram, or Spotify) posts a notification while your screen is on, Android / HyperOS normally drops down a native system floating pop-up banner at the top of your screen.
At the exact same time, Hyper Bridge renders the HyperIsland card. This can result in two overlapping popups appearing simultaneously:
- The native Xiaomi floating notification banner.
- The custom Hyper Bridge HyperIsland card.
flowchart TD
    A["Incoming App Notification"] --> B{"Both Popups Active?"}
    B -- Default Behavior --> C["Native HyperOS Floating Banner ⚠️"]
    B -- Default Behavior --> D["Hyper Bridge Island Card 🏝️"]
    C -. "Causes duplicate visual clutter" .-> D

    B -- "After Disabling Native Floating" --> E["Native Floating Banner Hidden 🚫"]
    B -- "After Disabling Native Floating" --> F["Clean HyperIsland Only ✅"]
How to Prevent Duplicate Popups#
You have two easy choices:
Choice A: Keep Only the Island (Recommended)#
- Navigate to Settings → Floating Notification Setup in Hyper Bridge.
- Tap any app card to jump directly to that app’s system notification settings.
- Turn OFF the system switch for “Floating notifications” (keep standard notifications and badges enabled).
- Return to Hyper Bridge and tap the checkmark to mark it as confirmed.
- Incoming messages will now display only on the HyperIsland, without the intrusive native system banner.
Choice B: Prefer Native Floating Banners#
If you prefer Xiaomi’s native floating heads-up popups over the island’s floating banner:
- Leave native floating notifications enabled on your apps.
- Go to Hyper Bridge Settings → Global Configuration and turn off Heads-up Popup (Notificación Emergente).
- Hyper Bridge will still bridge your notifications into the compact status bar pill and notification shade without drawing a floating island card.
Using the Floating Setup Screen#
Navigate to Settings → Floating Notification Setup (or tap the checklist card in System Health):
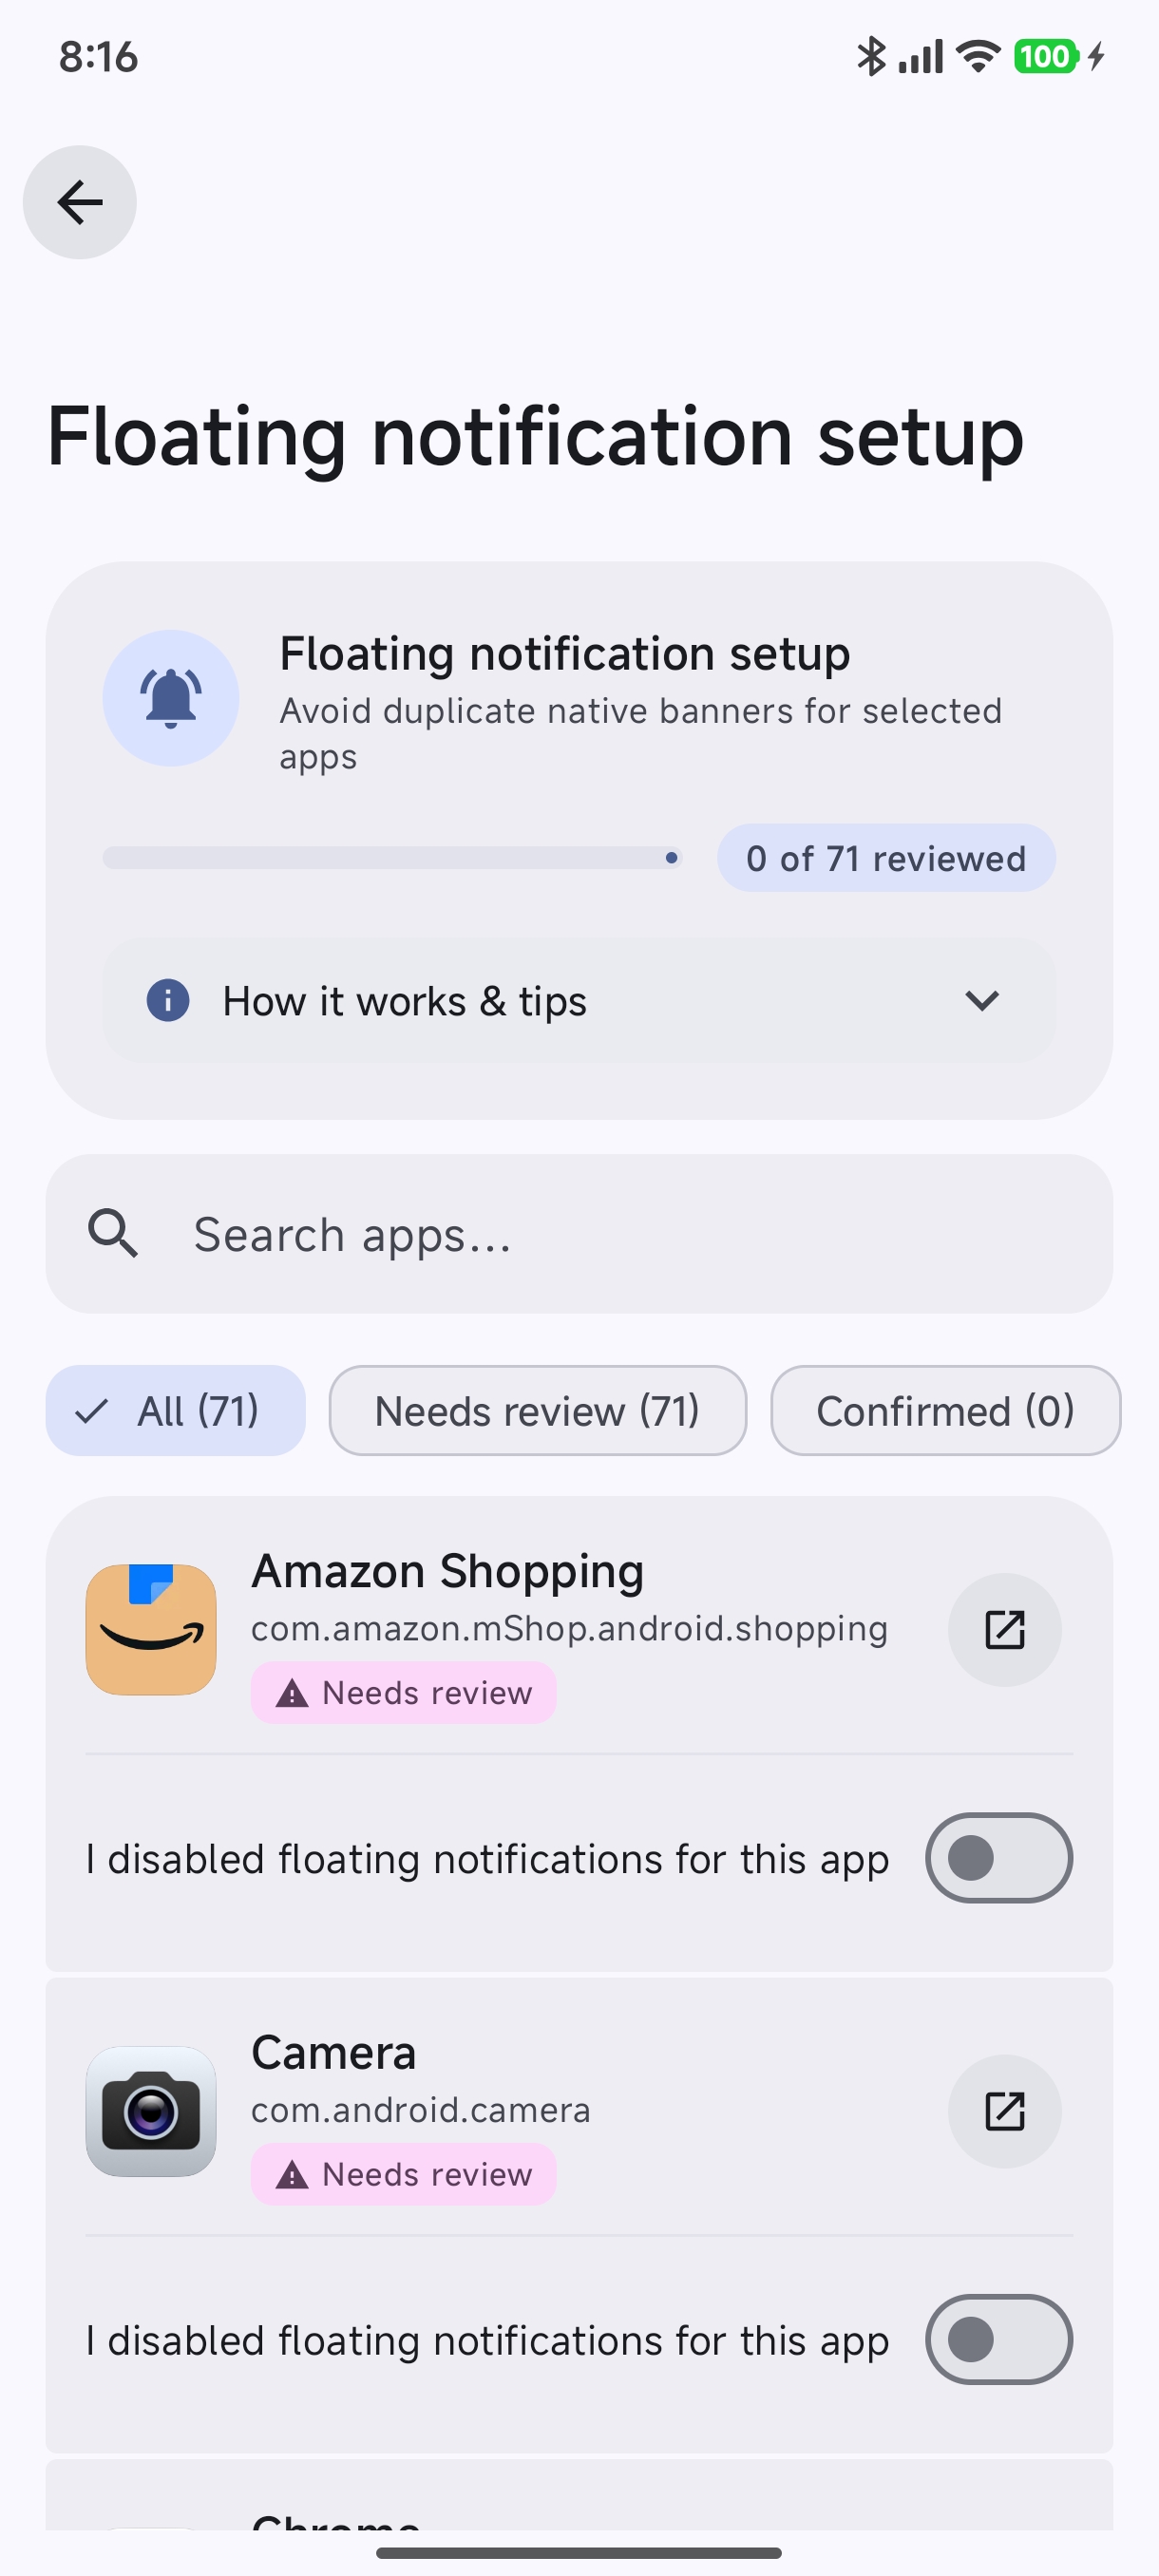
- Status Filter Chips:
- All: Displays all applications enabled in your Hyper Bridge library.
- Needs Review: Highlights apps where native floating banners have not yet been reviewed.
- Confirmed: Shows apps you have already reviewed and confirmed.
- Instant Search: Quickly search for any app by name or package identifier.
- 1-Tap App Settings Shortcut: Tap any app in the list to open its native Xiaomi notification channel page.
- Batch “Mark All as Confirmed”: If you are satisfied with your current notifications or prefer not to customize apps individually, toggle Mark all as confirmed in the top bar to dismiss all review badges at once.
Next Steps#
- Want to verify your service connection in real time? Open the Diagnostics & System Health Monitor.
- Running into persistent background drops? Read Known Issues & HyperOS Quirks.
- Explore advanced capabilities like Shizuku automation in the Shizuku Setup Guide.