Starting with Hyper Bridge 0.6.0, you can display incoming notifications using Xiaomi’s 10 Official HyperIsland Layout Templates (IslandTemplateCatalog).
Templates take the guesswork out of designing notification cards: each template provides a purpose-built visual architecture with optimal typography, progress elements, and button layouts optimized specifically for HyperOS 3 HyperIsland.
flowchart TD
    Catalog["Island Template Catalog\n(10 Official Xiaomi Templates)"] --> Select["Pick Template & Suggested Category\n(Design Flow Modal)"]
    Select --> Presets["Automatic Slot Wiring\n(Pill, Highlight Colors, Action Slots, Waypoints)"]
    Presets --> Translator["Generated Custom Translator\n(Fully editable in Visual Editor)"]
1. What is an Island Design?#
In Hyper Bridge, an Island Design is a high-level notification translator whose presentation is configured using an official layout template (PresentationMode.TEMPLATE).
When you create a design:
- You select a visual preset from the Island Template Gallery.
- You pick which notification type (Navigation, Delivery, Calls, Media, Download, or Standard) should trigger it.
- Hyper Bridge automatically generates an optimized rule and pre-wires all title variables, action slots, compact pill indicators, and accent colors.
- You can keep it as-is or open it in the Visual Editor to tweak keywords, regex matching, or button behaviors!
2. The 10 Official Xiaomi Templates#
The following table details all 10 official layout templates available in the in-app gallery:
| Template ID | Template Name | Suggested Type | Visual Card Style & Distinct Elements |
|---|---|---|---|
tpl_weather_nav | Weather & Navigation | Navigation, Standard | Context Header (BASE_TYPE_1): Small subtitle context line above an accented bold destination title, red accent color, and pill showing current milestone distance. |
tpl_payment_wallet | Payment & Wallet | Messaging, Standard | Transaction Card (BASE_TYPE_2): Large receipt header, payment total highlight, and built-in 1-tap Copy Verification Code / OTP action button. |
tpl_call_kit | Call Management | Calls | Call Card (CALL): Prominent caller avatar on the left, live duration chronometer, and circular green Accept and red Decline action buttons. |
tpl_ride_delivery | Ride & Delivery Tracker | Progress, Standard | Vehicle Waypoint Card: Live delivery vehicle waypoint graphic moving along a route line, ETA text, and driver contact shortcuts. |
tpl_queue_wait | Queue & Wait Time | Progress, Standard | Queue Status Card: Wait-time gauge, queue position badge, and accented progress bar indicating remaining wait time. |
tpl_parking_meter | Parking Meter | Timers, Progress | Countdown Card: Real-time ticking chronometer displaying remaining parking duration, with quick extend actions. |
tpl_file_transfer | File Download / Transfer | Downloads, Progress | Download Progress Card: Dynamic green percentage progress bar (showPercentage = true) and status pill displaying exact download percent (78%). |
tpl_promo_coupon | Promos & Coupons | Standard | Voucher Card: Orange promotional highlight badge with a direct View Deal / Open URL smart button. |
tpl_boarding_pass | Boarding Pass & Travel | Standard | Travel Ticket Card: Ticket-style layout drawn over a tinted background image, boarding gate information, and flight departure timer. |
tpl_courier_tracking | Courier & Parcel Tracking | Progress, Standard | Parcel Card: Shipment checkpoint milestones with an integrated 1-tap Track Package smart action button. |
Compact Media Player (tpl_media_compact):
In addition to the 10 gallery templates, Hyper Bridge includes the compact media template featuring album art masking, live artist and track titles, and audio playback controls.
3. Step-by-Step: Adding a Design from a Template#
Follow these steps to activate a template design in seconds directly from the Design Bento Hub:
Step 1: Open the Designs Manager & Add Design#
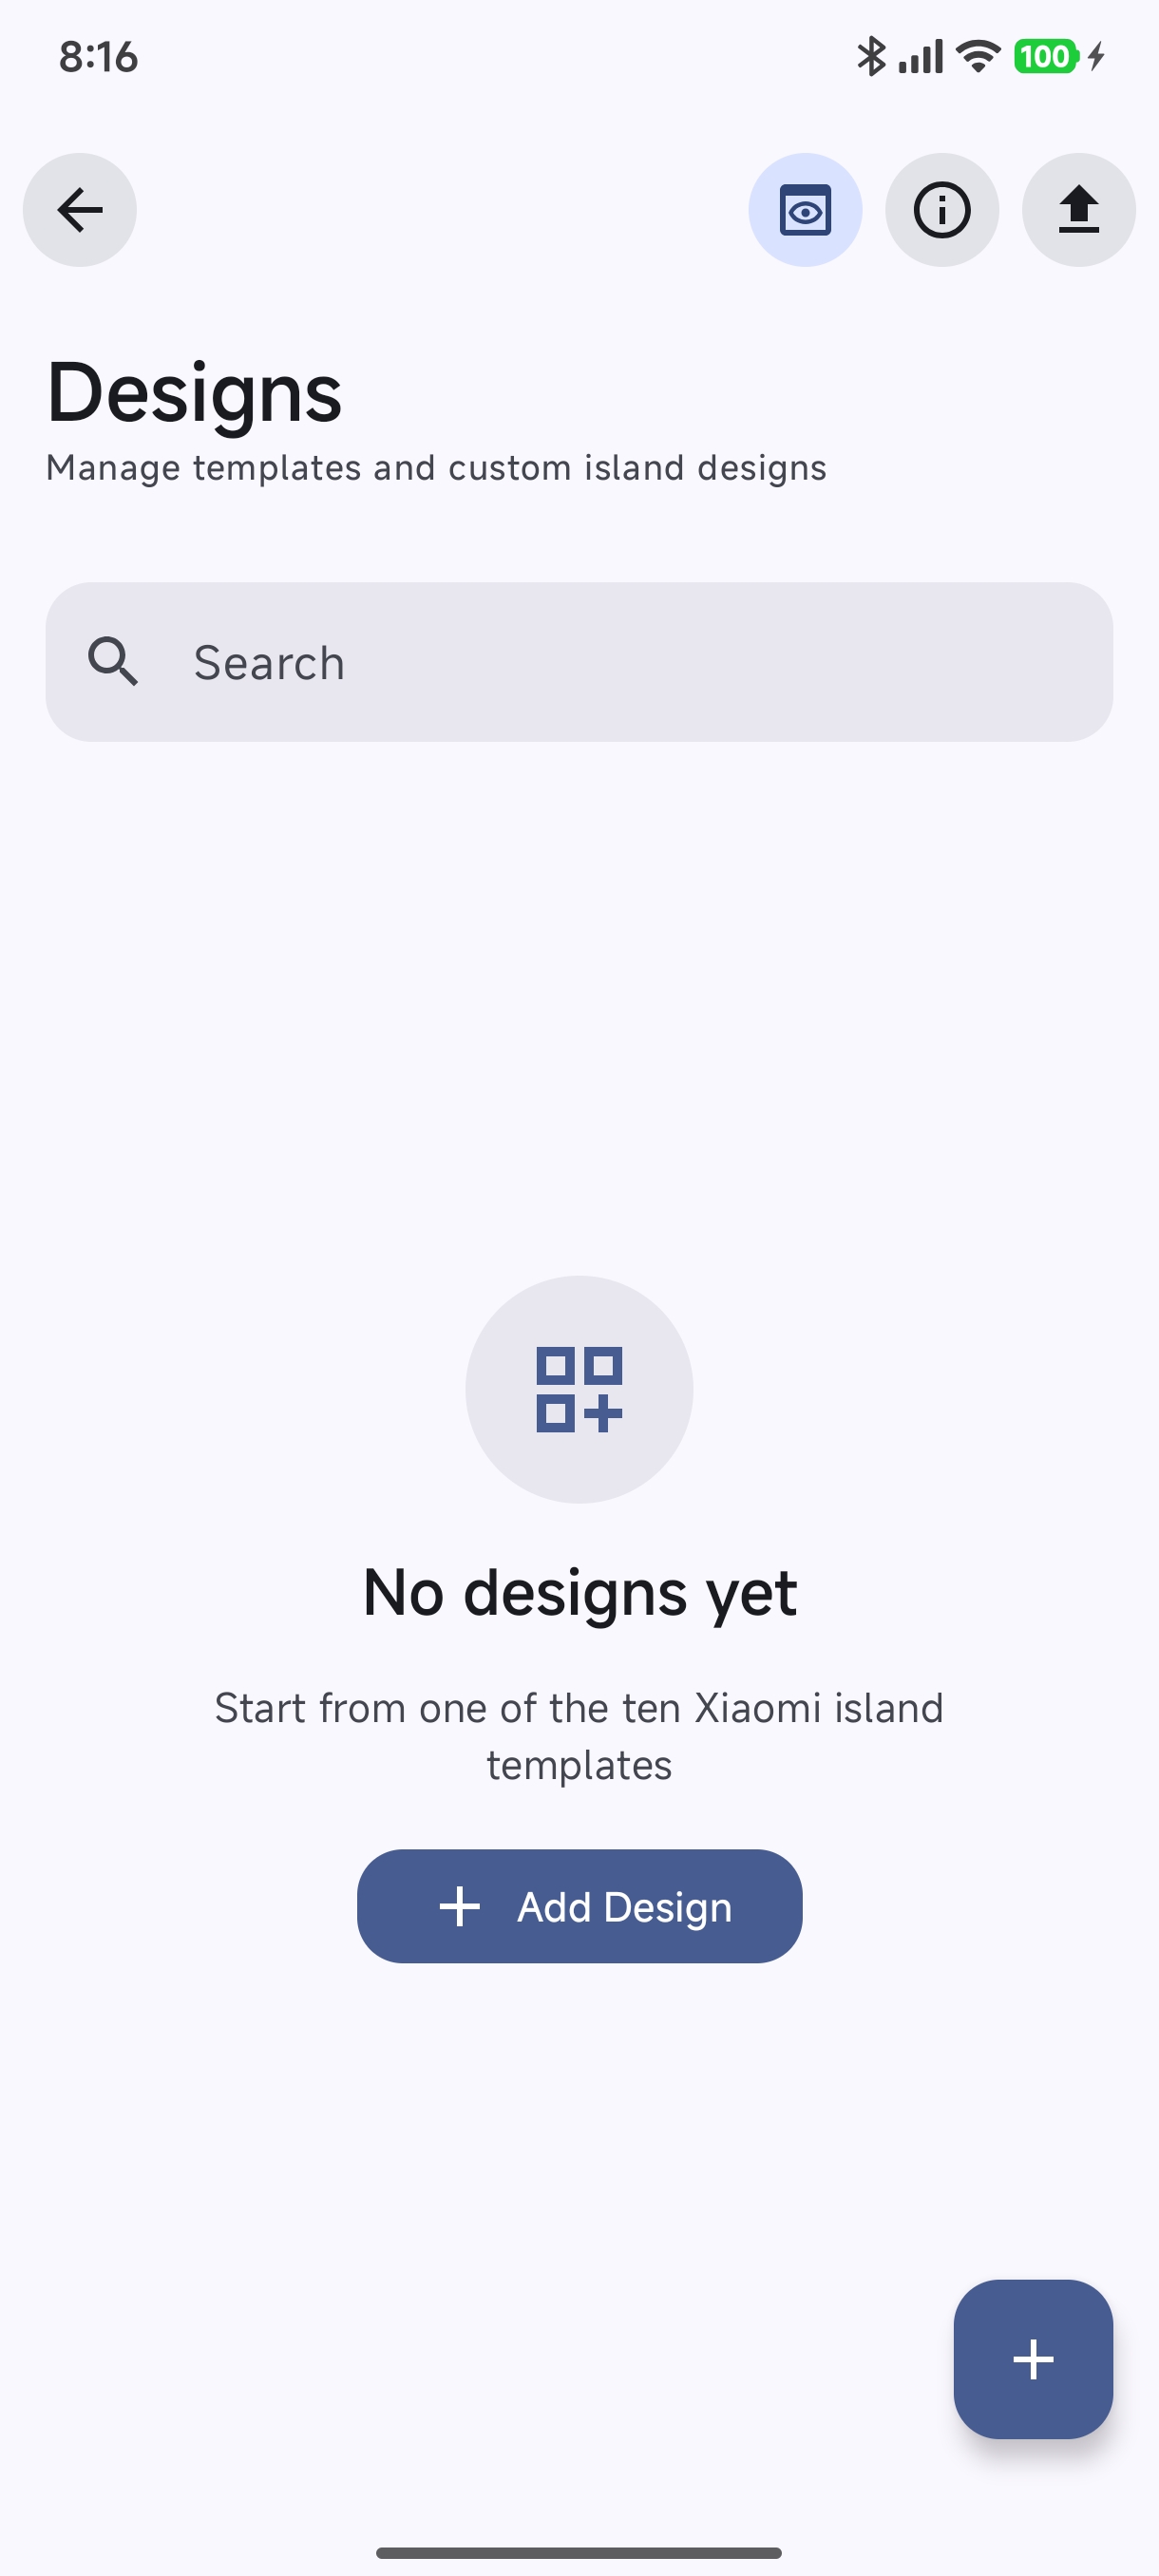
Navigate to the Design screen and tap the Designs Bento card. If you don’t have any active custom designs yet, you will be greeted by the Designs Manager empty state. Tap Add Design (or tap the + FAB and choose Custom Design).
Step 2: Choose Design Creation Method#
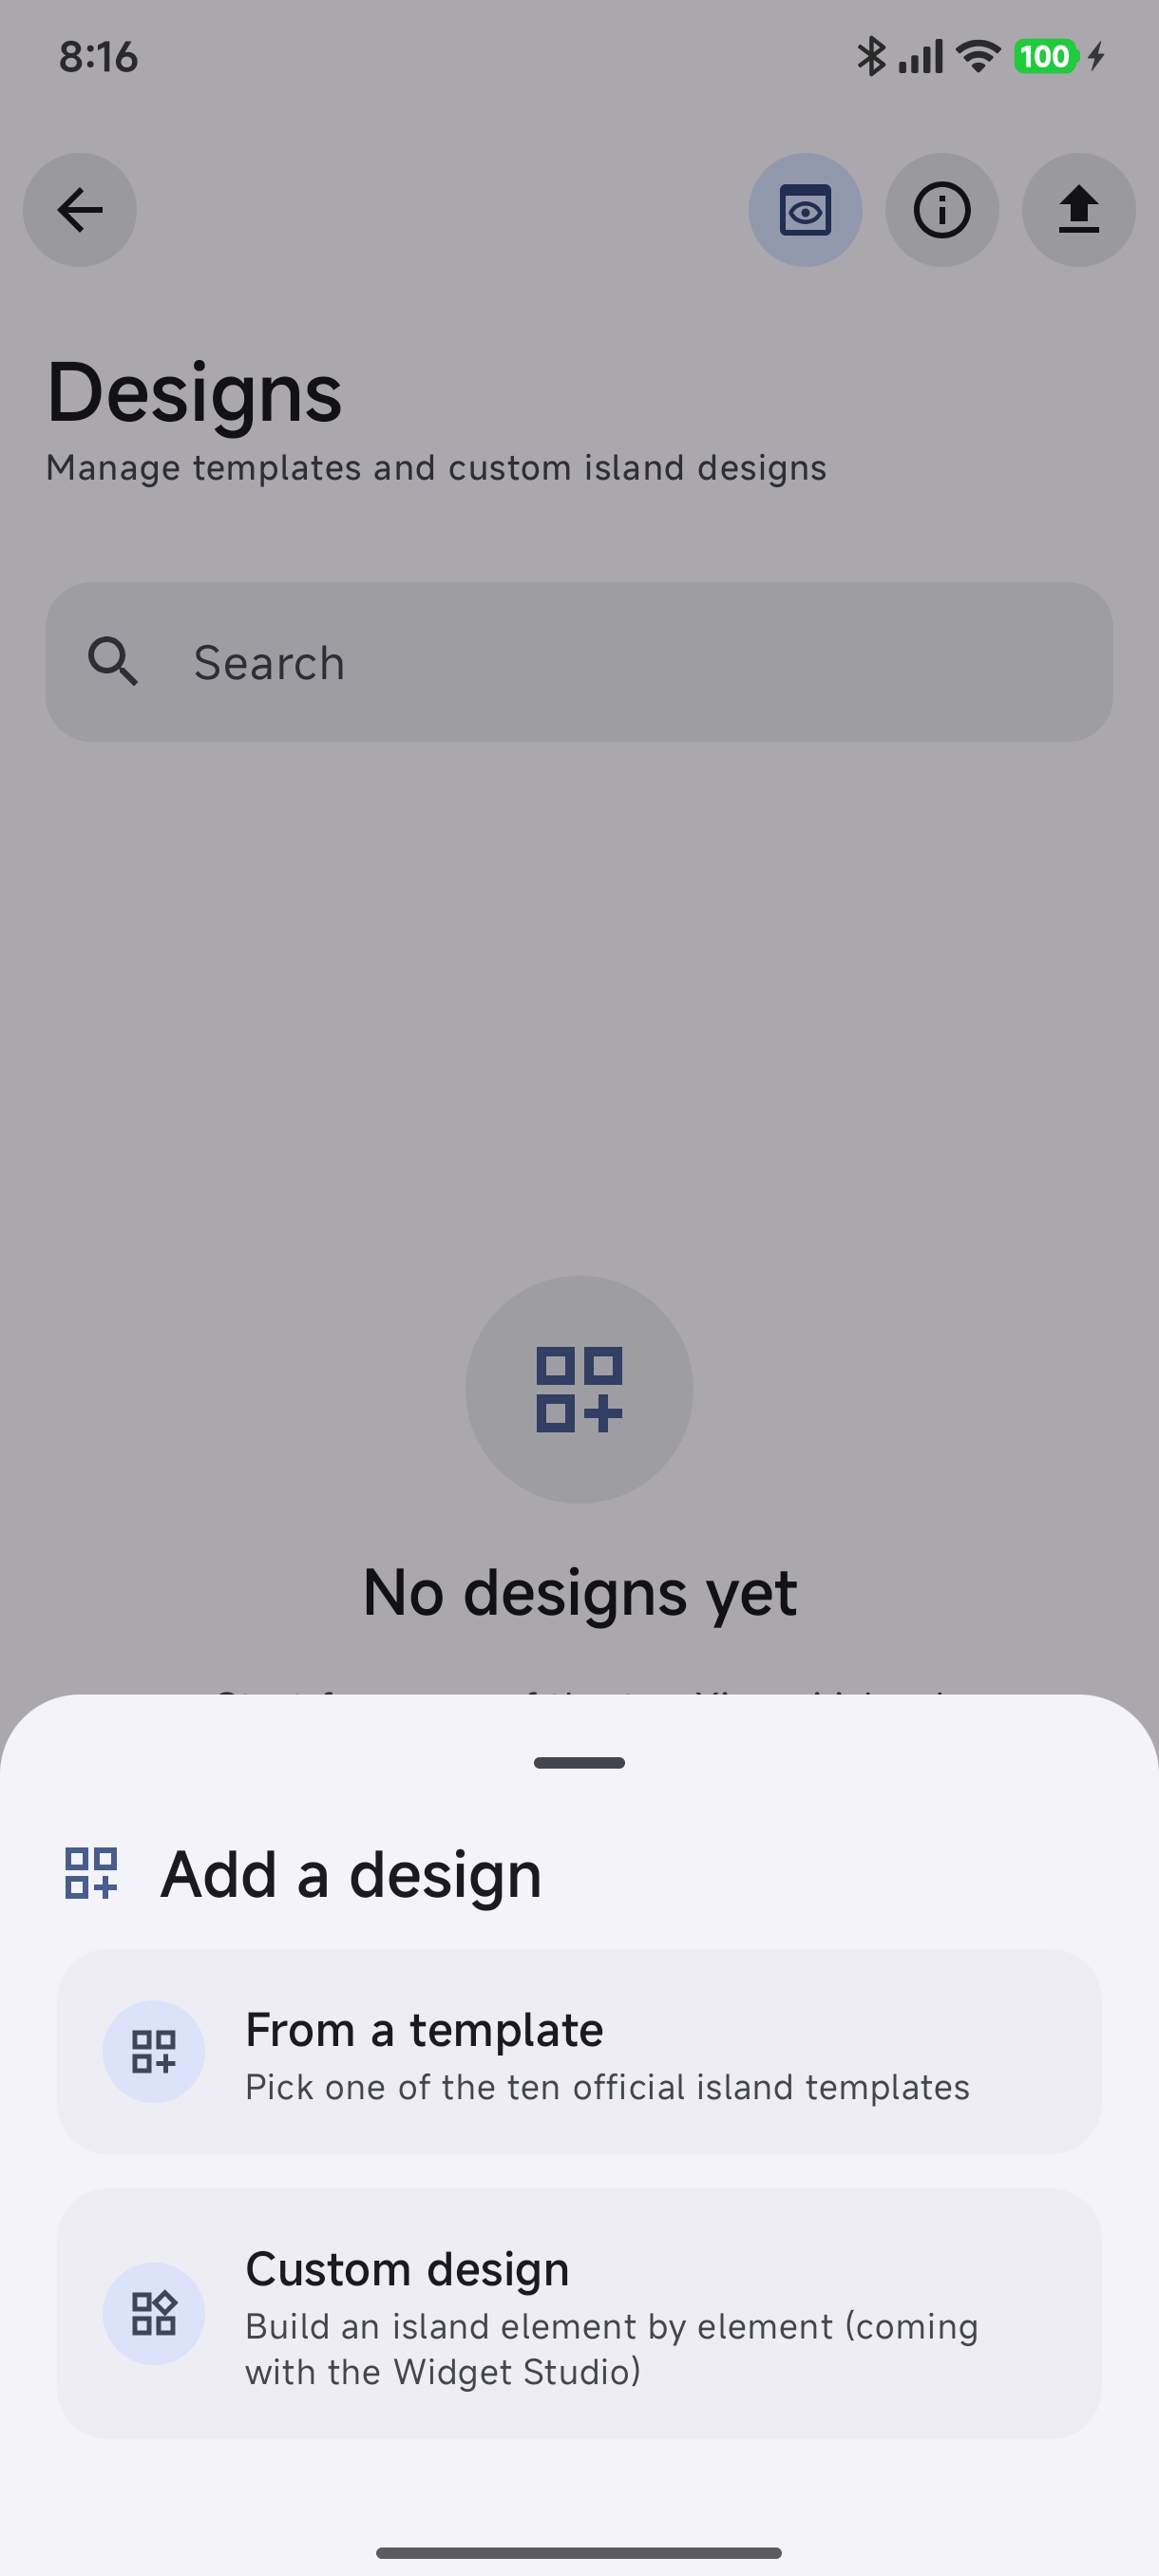
From the bottom sheet, select From a template to browse Xiaomi’s official HyperIsland layout templates, or choose Custom design to create an empty canvas.
Step 3: Browse the Island Template Picker#
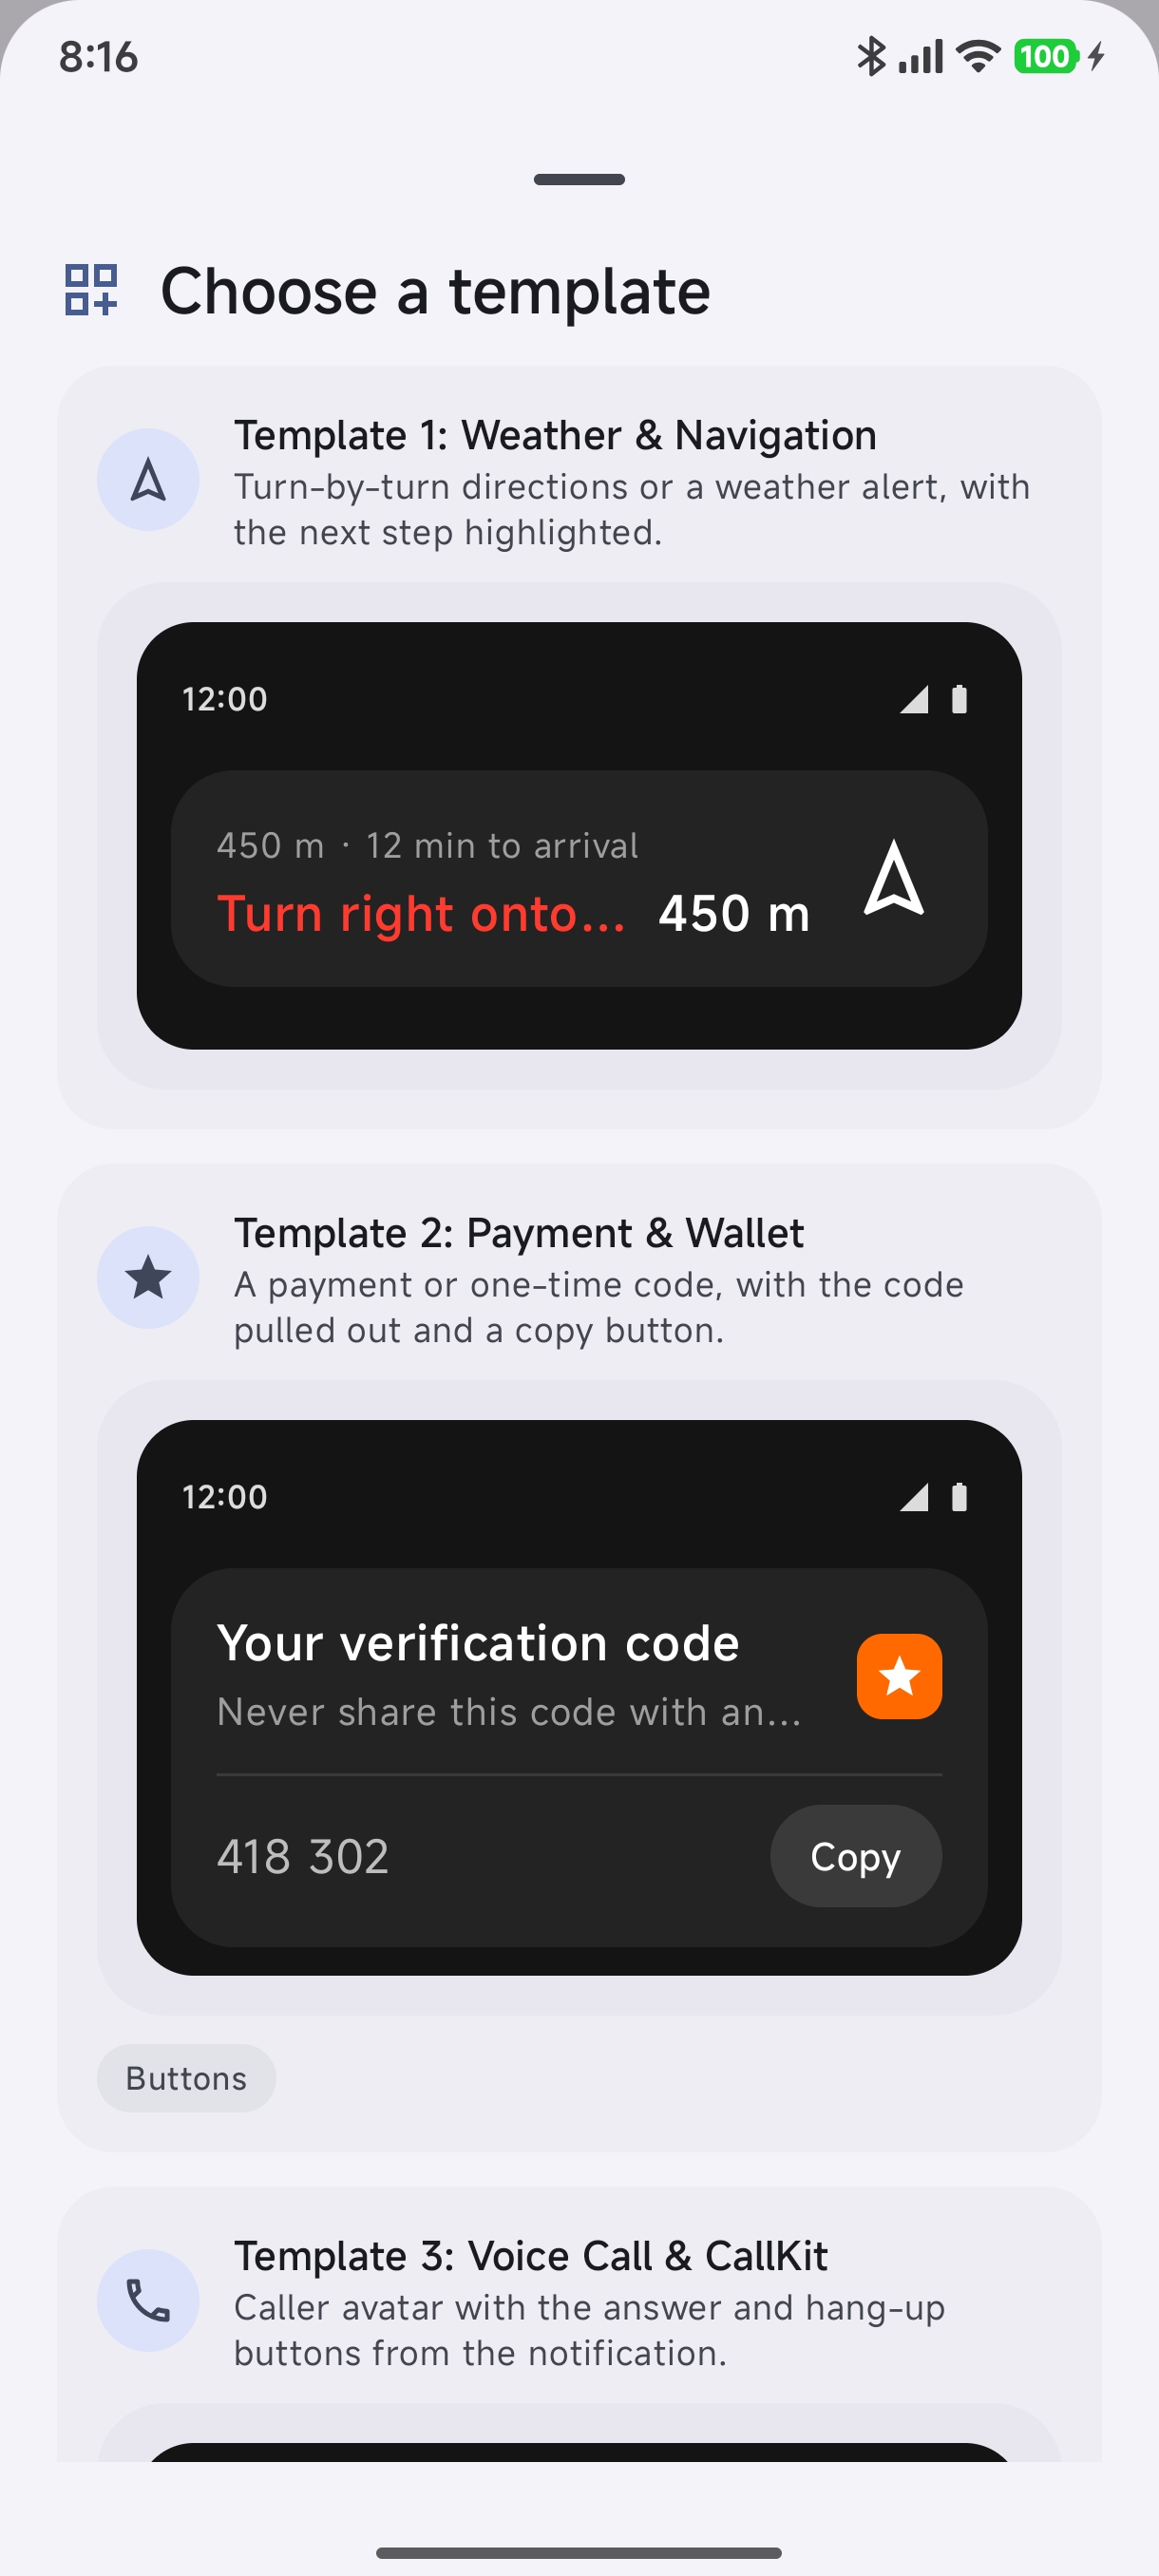
Browse the interactive catalog containing Xiaomi’s 10 official HyperIsland templates. Each entry showcases the layout archetype (e.g. Weather & Navigation, Payment & Wallet, Call Management, Ride & Delivery Tracker).
Step 4: Preview Template Layout#
Tap any template to inspect its live preview, including its compact pill presentation, expanded island hierarchy, and default action button slots.
Step 5: Configure Target Scope & Application#
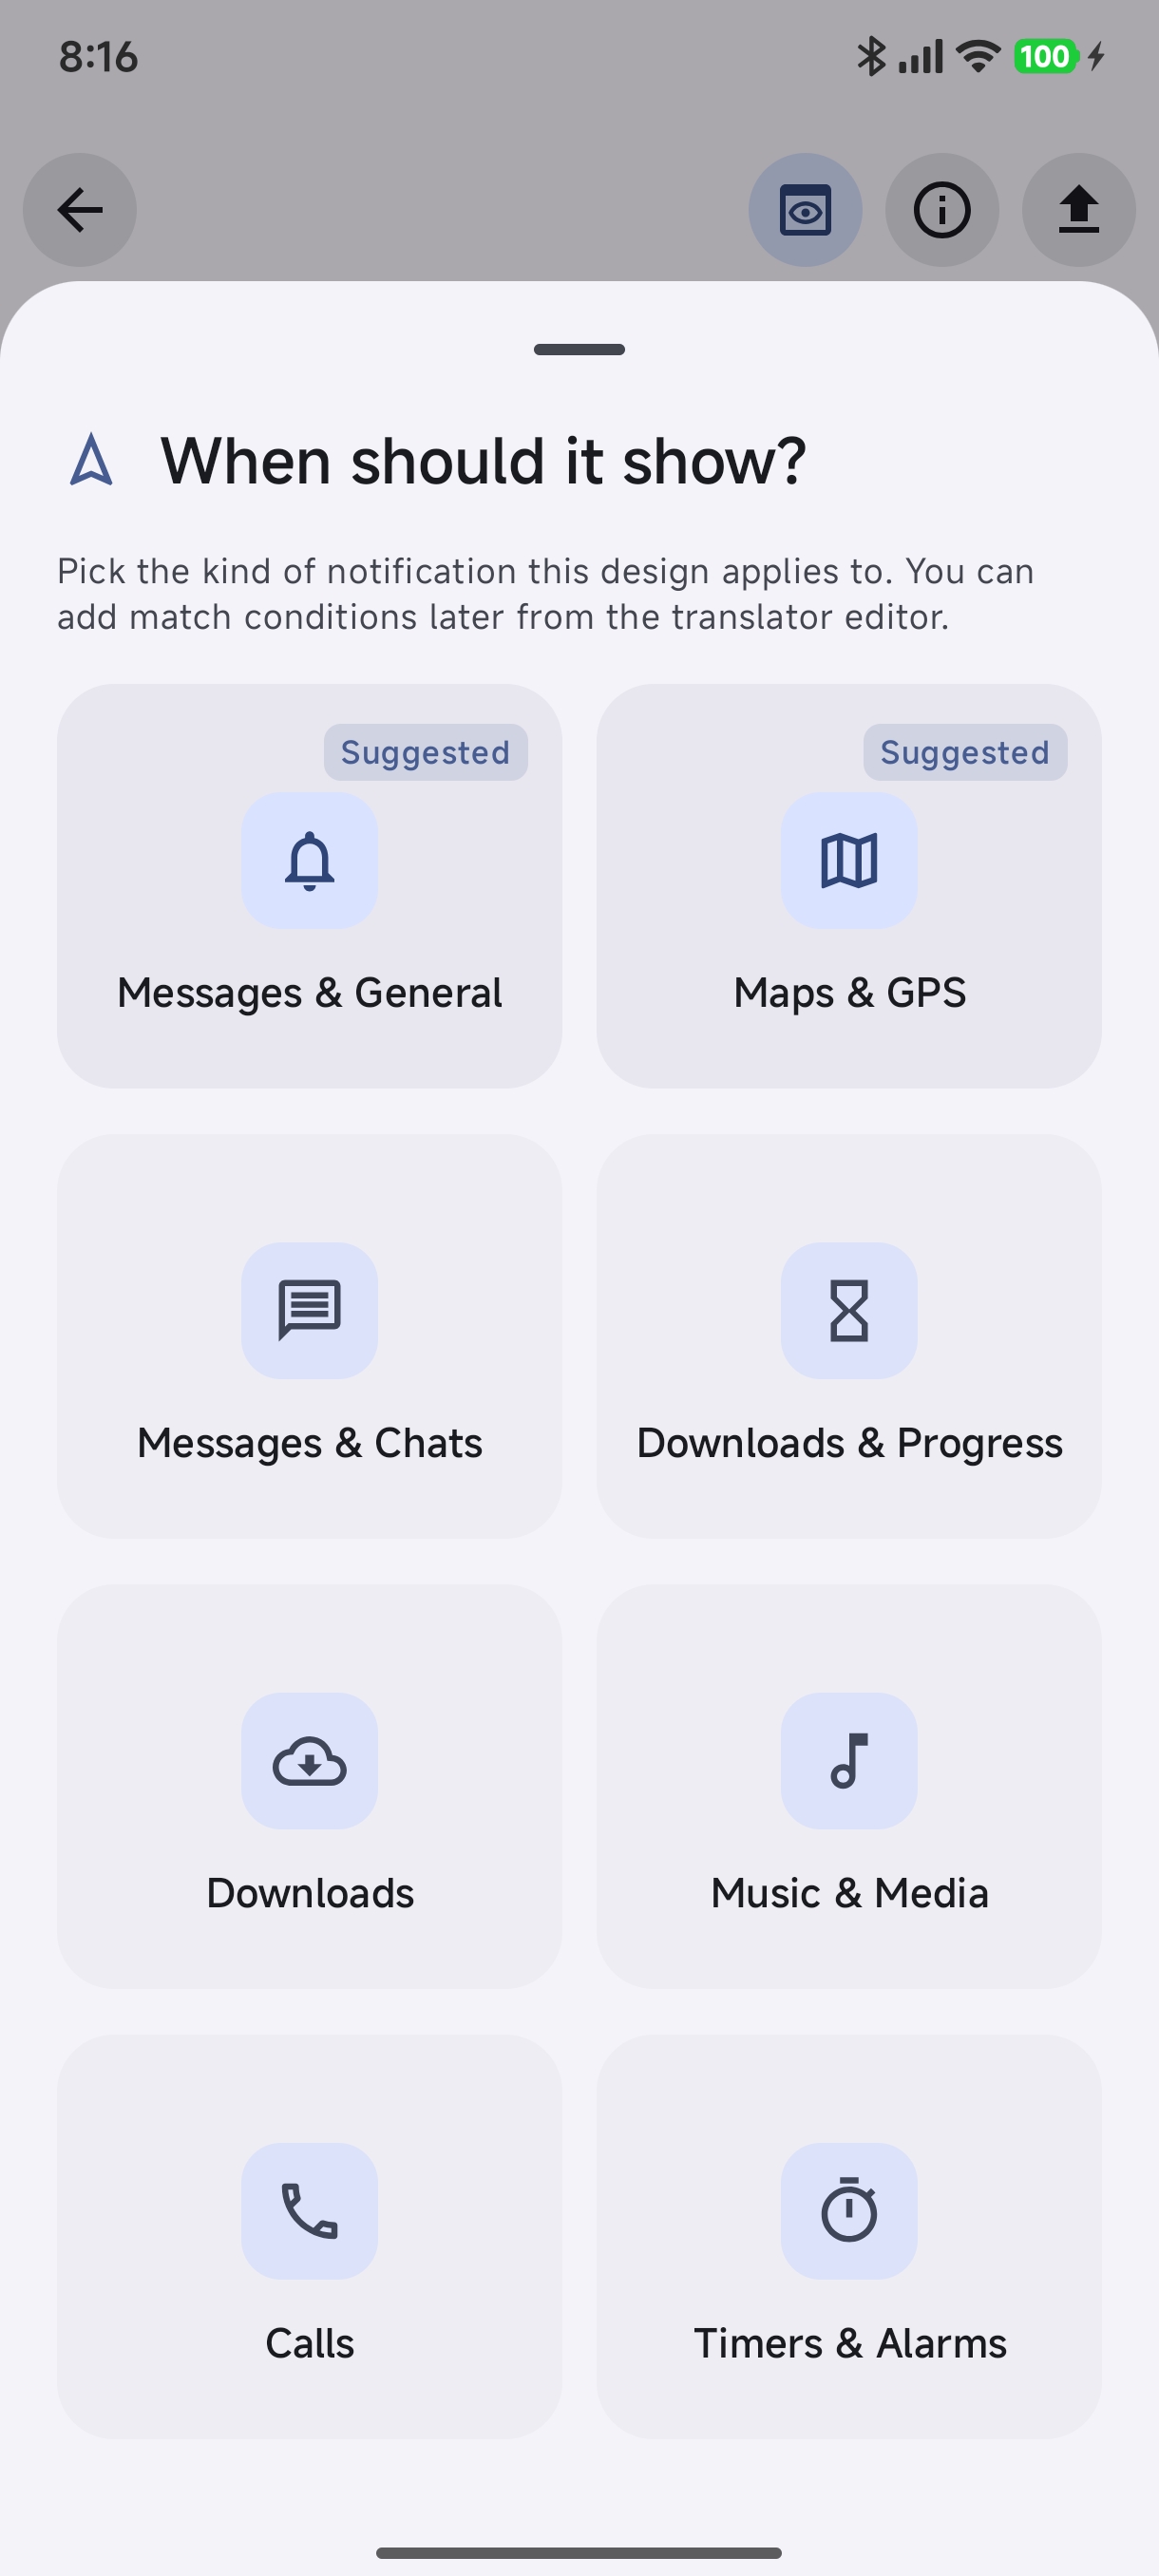
Set the target scope for this design. You can assign the template to a specific notification type (Navigation, Messaging, Media, Calls, Downloads & Progress, or Standard), or restrict it to specific applications.
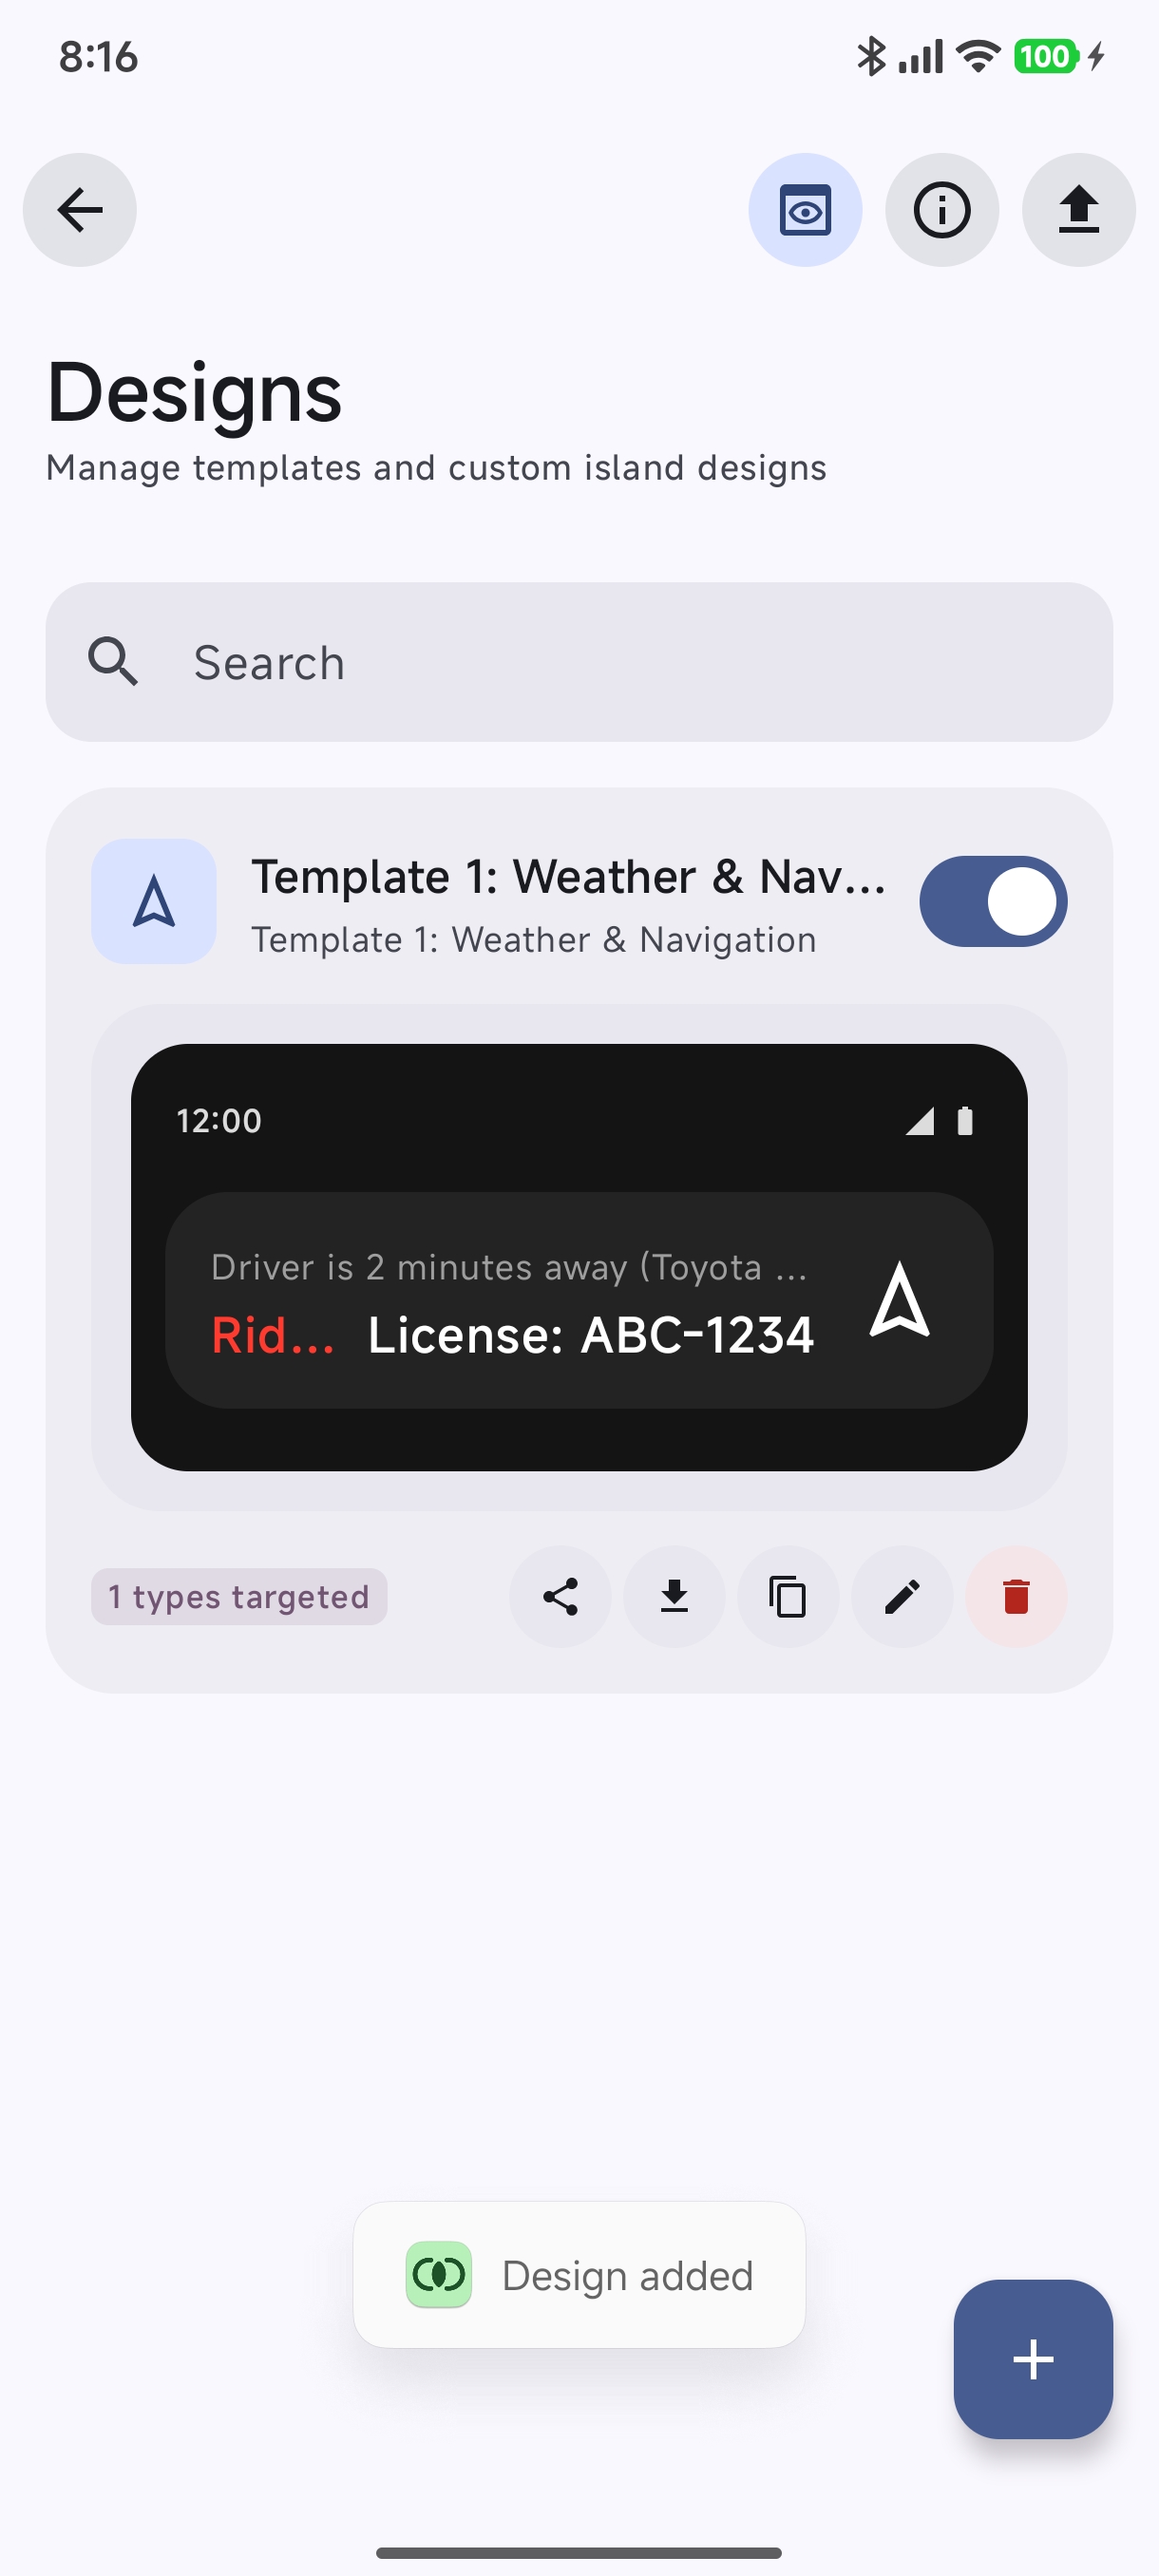
Step 6: Save & Manage Active Designs#
Tap Save Design. Your new template-driven design is immediately registered and displayed in the Designs Manager with a live interactive HyperIsland preview toggle.
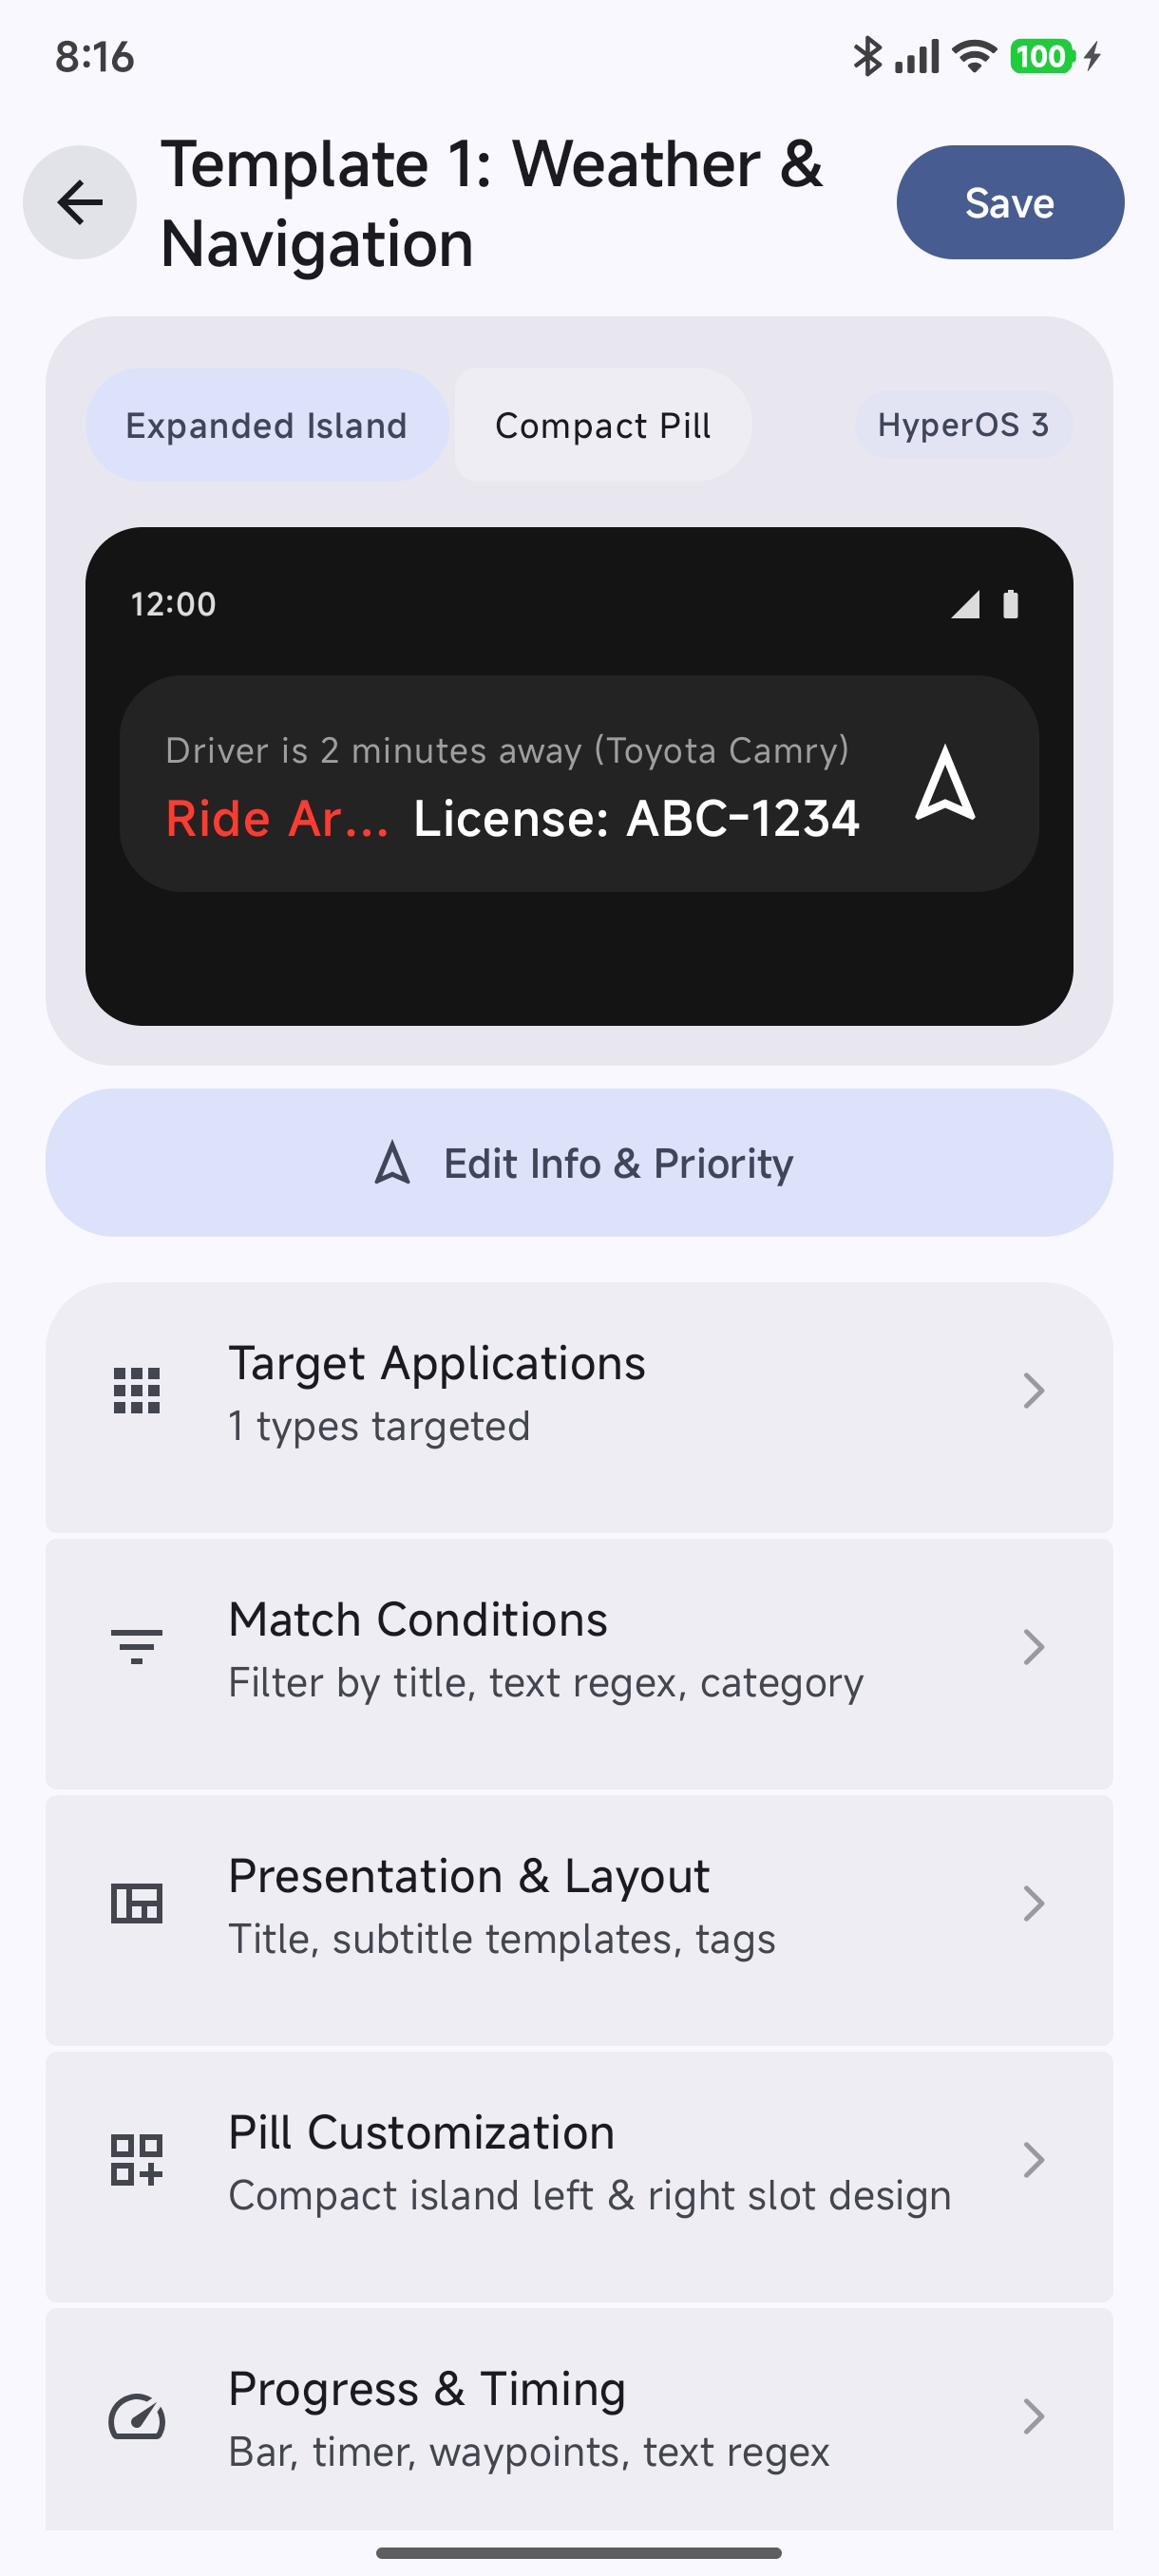
4. Editing & Customizing Design Properties#
Every design created from a template is powered under the hood by Hyper Bridge’s Custom Translator Engine.
Custom designs share the exact same visual editing options as custom translators! To learn how to customize text variable tokens (
{notif.title}, {notif.text}), regex patterns, compact pill slots, progress meters, action button intents, and themes, follow the complete Custom Translators User Guide.From the Designs Manager:
- Edit in Visual Editor: Tap the Edit (Pencil) icon on any active design card to open the complete visual editor.
- Interactive Preview: Tap the top switch to toggle between Expanded Island and Compact Pill previews in real-time.
- Duplicate & Specialize: Tap Duplicate to clone an existing template design for another app.
- Export & Share: Tap Export to save your design as a standalone
.htransfile.